Knight Models – Deathstroke
So this will be the first of the painting guide to have supporting pictures to go along with Deathstroke form knight models. I tried to capture as many steps as possible but I think there may be a few missing. But it’s a start and with a bit of luck I’ll get better as I go along.
I started off using the airbrush with Vallejo Black Surface Primer (74.602). Then once this was dry I went back over the model with Vallejo Grey Surface Primer (74.601) but I sprayed down at about a forty five degree angle. This helps to show where the light will catch the model and sets up the highlights and shading.

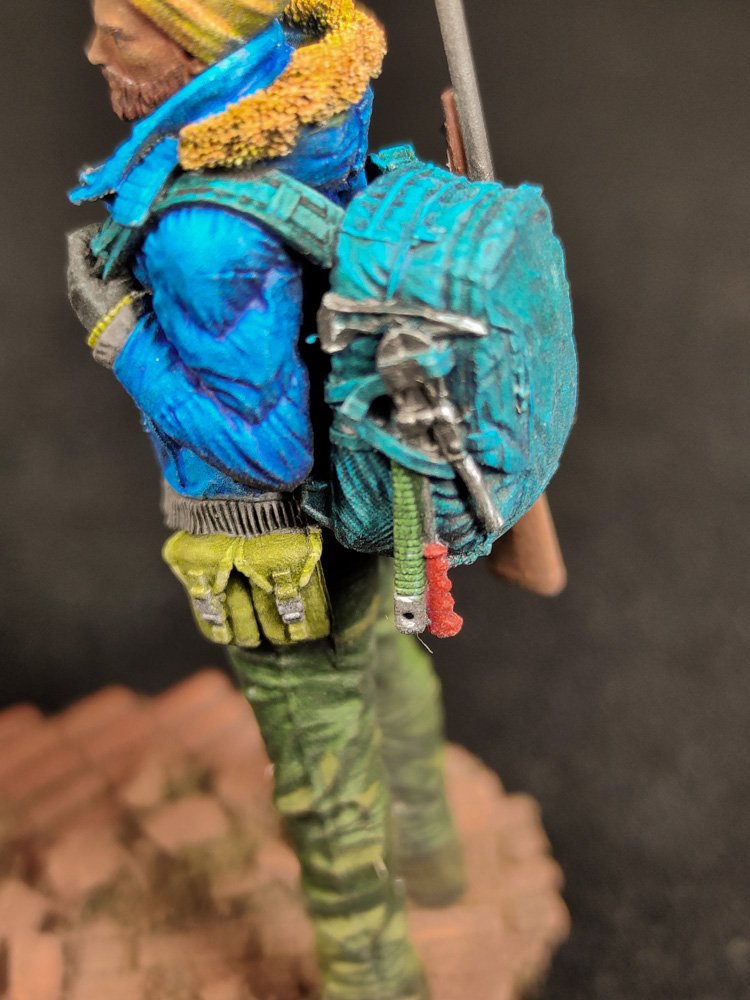
Then I used watered down Vallejo German Uniform (70.920) in a ratio of two parts paint to three water. This gave me a base colour for the model. On top of this is used a watered down Vallejo Turquoise (70.996). Next I started to build up the highlights by mixing a couple of drops of Vallejo White Grey (70.993) into the turquoise mix, keeping it quite thin with a bit of water. That was it for the body suit, at least for now.
I then started on the orange detail to get more of a feel for the overall look. For this I used Vallejo Orange Rust (71.130) and because it doesn’t cover that well I actually used a couple of light coats. I then mixed things up a bit and used some Vallejo Dark Grey Wash (72.708) on the webbing areas to darken them down to give what I think is a black material look. Then I went back to the orange sections and highlighted them with Vallejo Orange Fire (72.708).
Next I went back over the highlights on the turquoise section with Vallejo Light Turquoise (70.840) focusing on the parts that light would naturally catch. Then I mixed some Vallejo Aluminuim (71.062) with some of the Vallejo Turquoise, which I used on the staff and sword hilt.
The final step for the figure was to try and add some damage, something I haven’t done in the past. To do the damage chips I used a 50/50 mix of Vallejo Black Metal (71.073) and Vallejo Gun Grey (71.072). I used the image on the packaging to pick out the areas to add the damage.
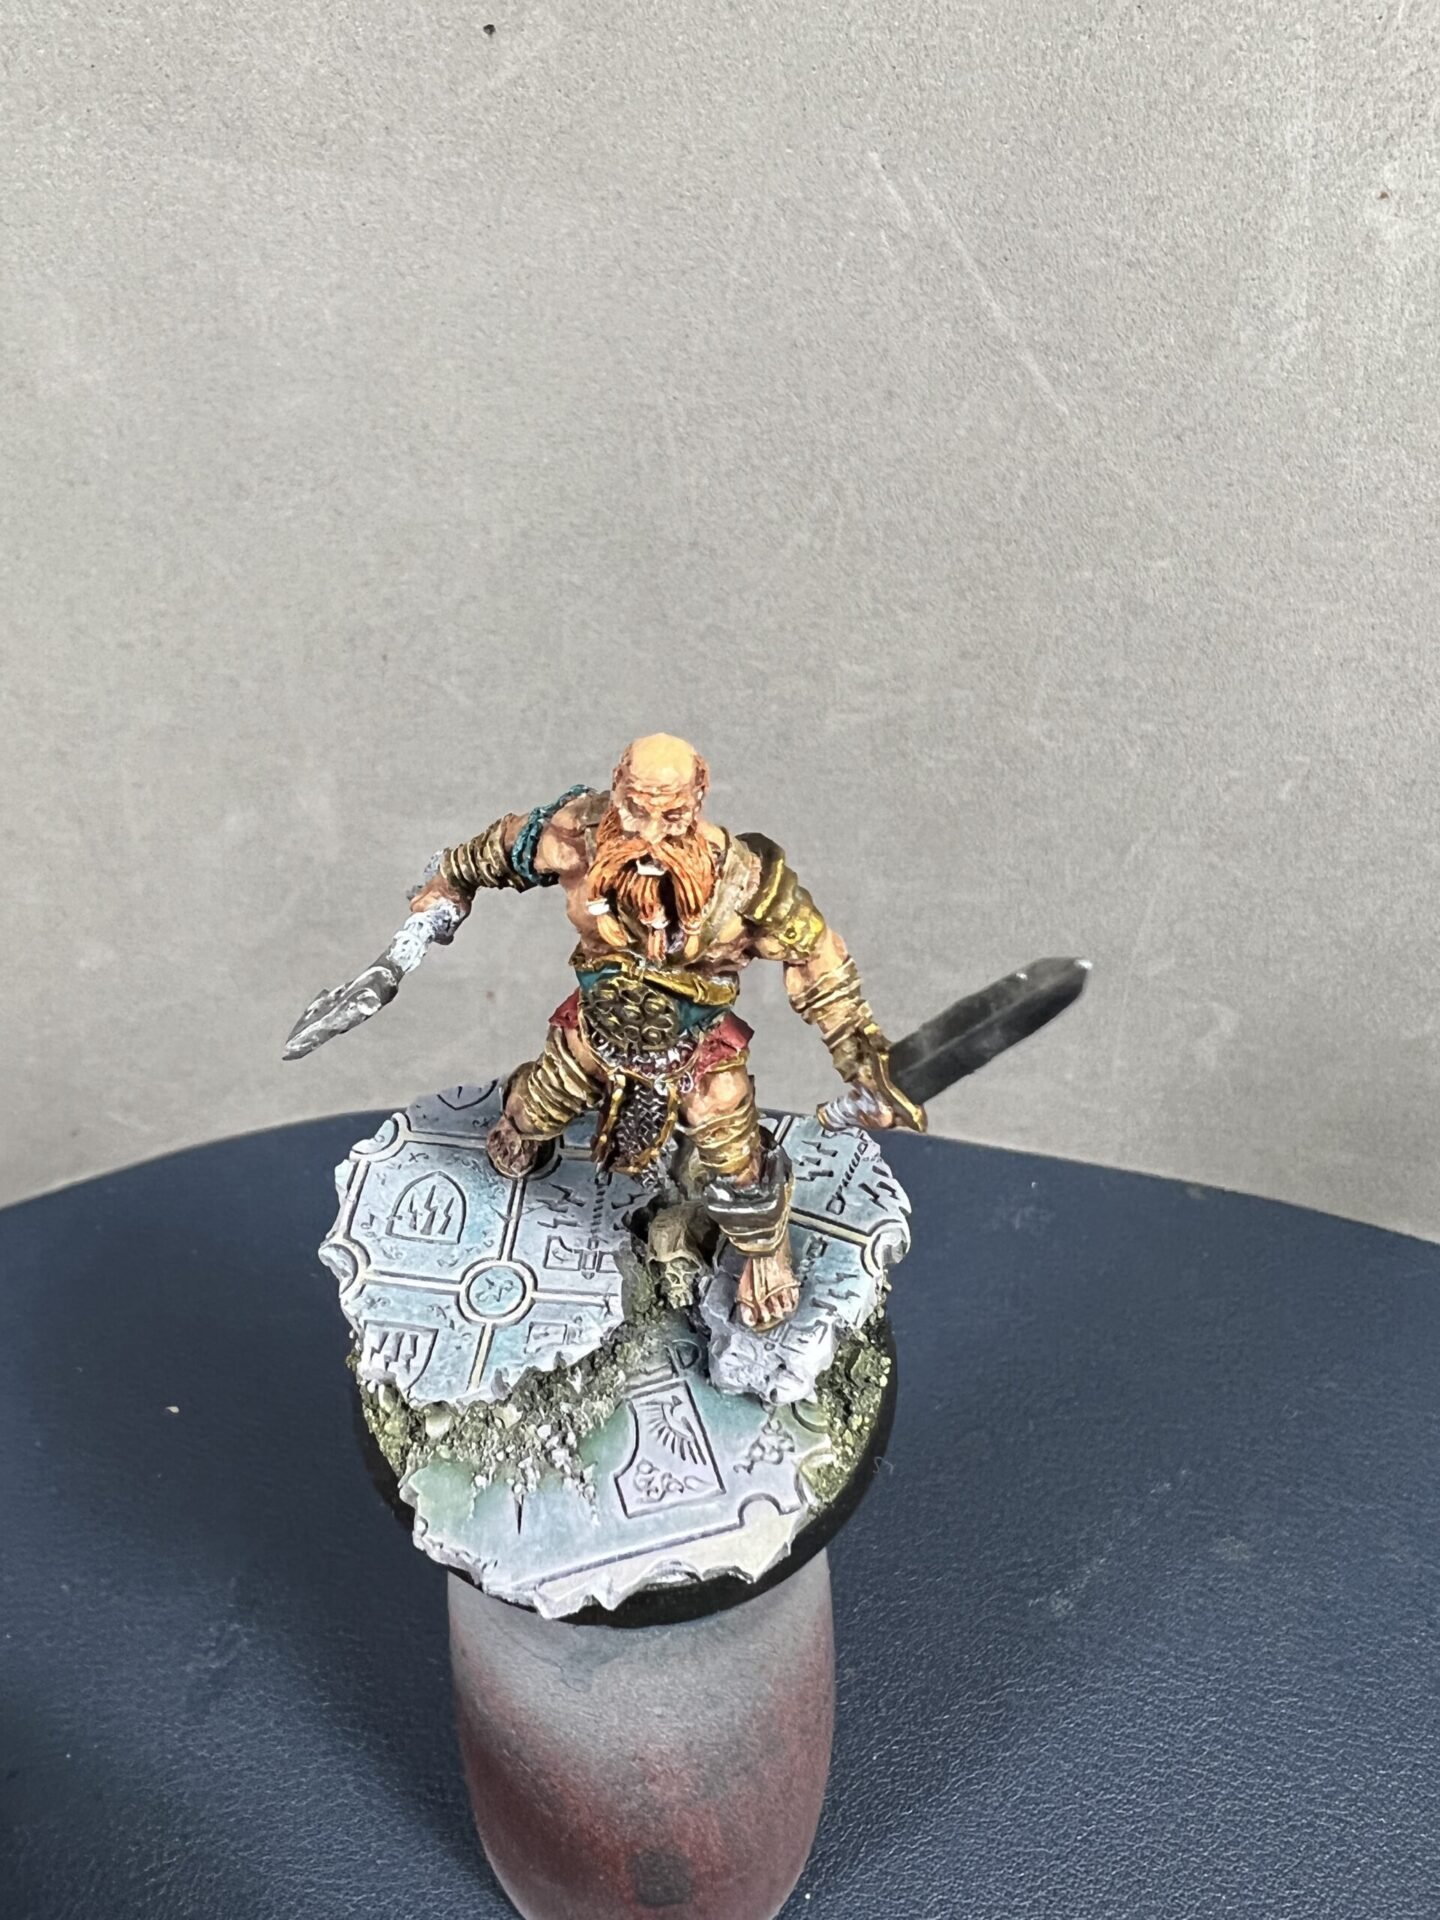
For the base I used Vallejo Black Surface Primer to start things off. Then I started to pick out the individual flag sections with a mix of Vallejo Leather Brown (72.740), Vallejo Rust (71.080) and Vallejo Desert Yellow (72.763). These were then mixed together to allow me to do some edges highlights on the cobbles. The grate was given a coat of Vallejo Gun Grey. All of the stone sections were then given a coat of Vallejo Brown Wash (76.513) followed by some Vallejo Rust Wash (76.506). At the same time the grate was given a coat of Secret Weapon Soft Body Black wash.
And that finished off the painting process. So the next step was to do the weathering. To do this I started with a dusting of Secret Weapon Dark Earth Weathering powder followed by Secret Weapon Sewage Muck Weathering powder. Everything was then sealed with Vallejo Satin Varnish again using the airbrush again to get the best coverage.
And there you have my first go at a painting guide done especially for the site. I’ve enjoyed doing it and I hope you like it. One other thing I’d like to add is that if you have any comments, good or bad the please feel free to leave them. The more feedback I get the more I will be able to tailor my offerings.